Monday, March 29, 2010

Forgotten trash to organizing treasure - the No. 3 crate

This is the story of a crate that was sitting, sad and lonely behind the workshop, in the rain, in the heat, for who knows how many years. It has developed quite a bit of weathered character.


And it was sitting on the ground for 1.5 seconds before my shadow had to check it out.


She's "helping." Thanks Calliope. *eye roll*


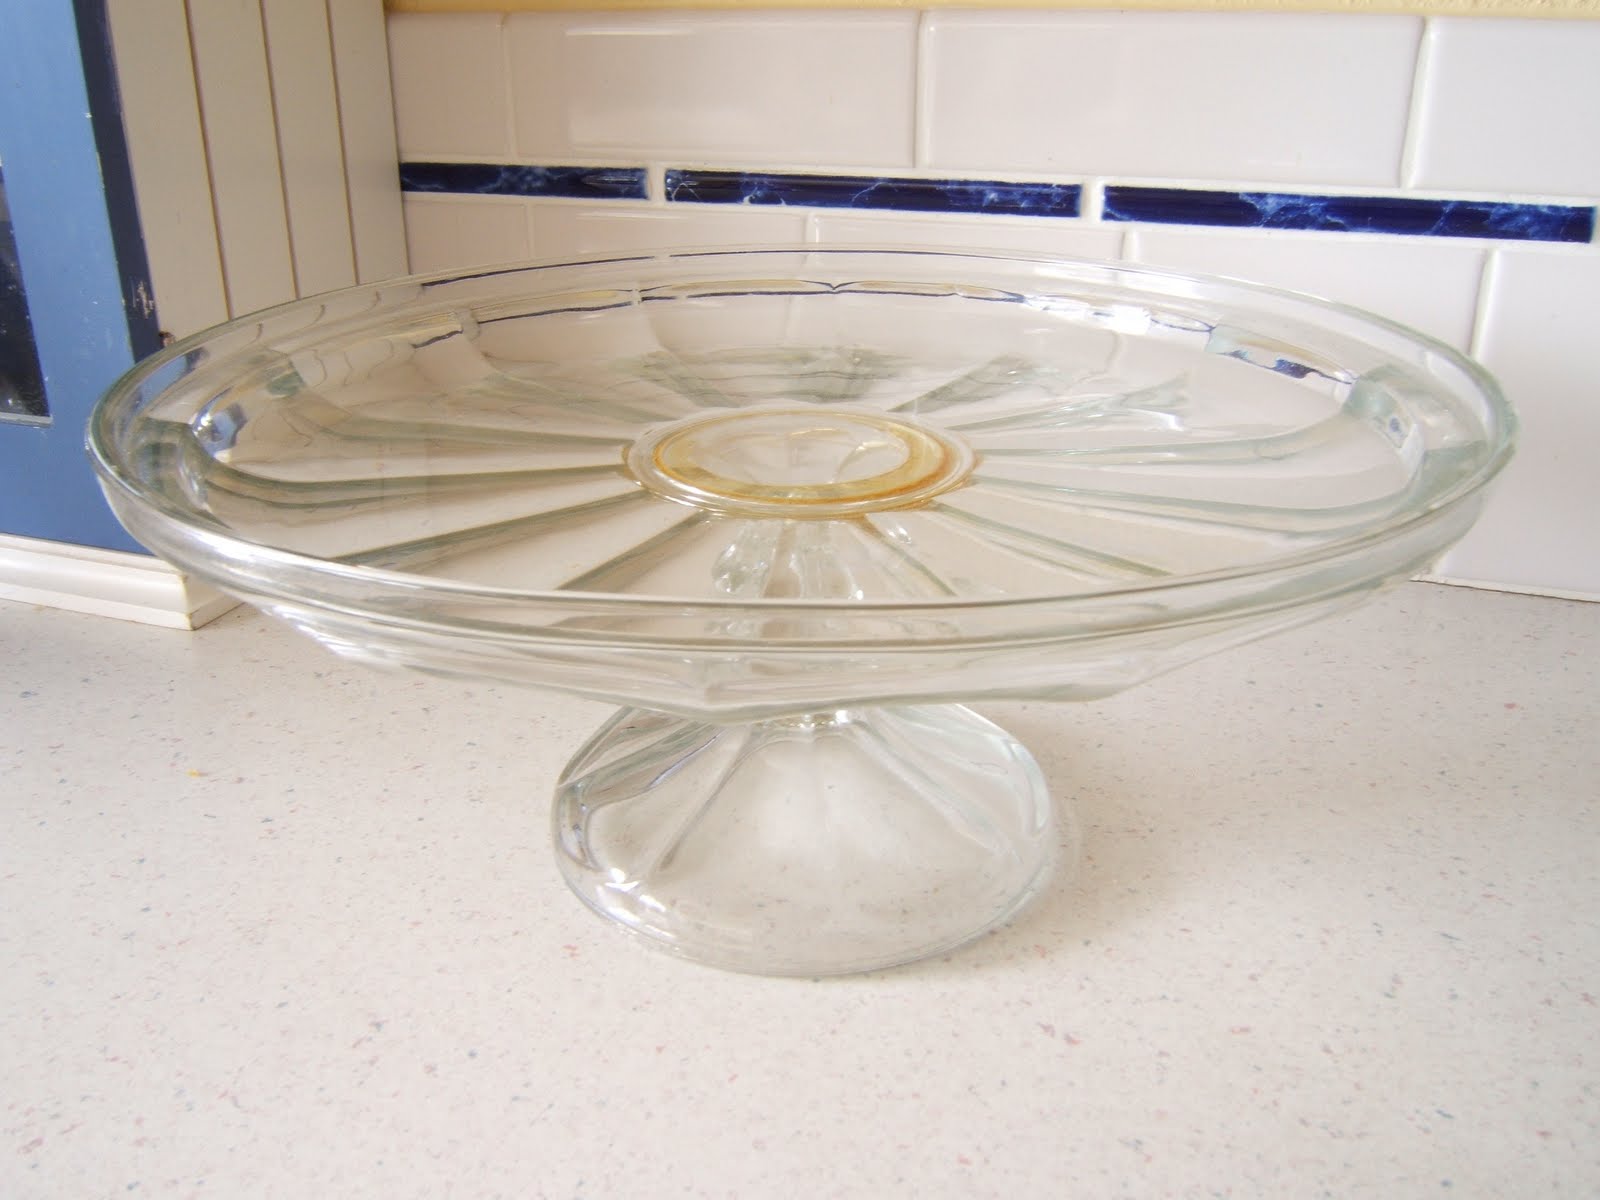
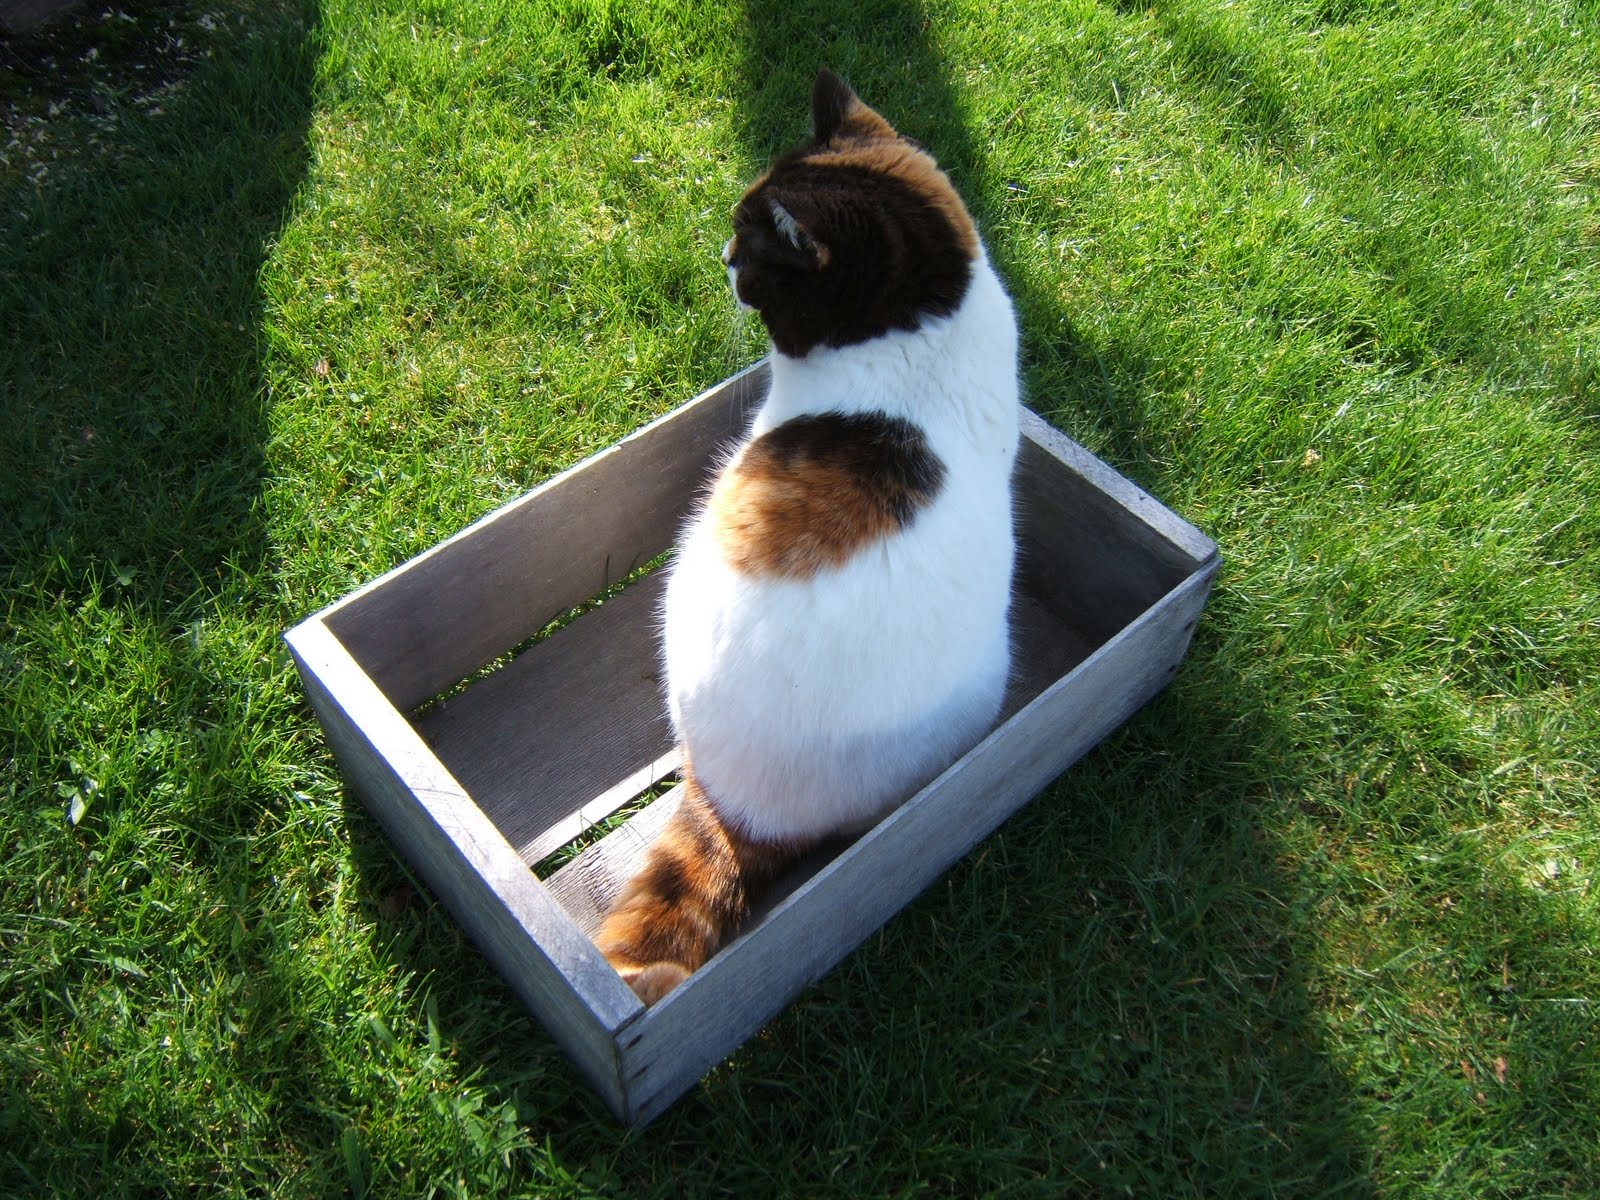
In my quest to turn my desk into a craft station I've been on the lookout for under-the-bed storage - places to put the papers and whatsits that I never look at that are currently being stored in my desk. When I saw the crate I got stars in my eyes and I knew it would be perfect for this!


First I whitewashed it. I wanted to keep the weathered look but the wood also needed a little something to protect it a bit.


I didn't take any photos of the whitewashing because it was freezing outside and I just wanted to get it done and get back in the house! Just imagine a picturesque scene like Tom Sawyer or something.


I also got the idea to put the oh-so-popular numbers on the side. I am not a high-tech crafter and I don't have a fancy Cricut to just whip out some vinyl so I had to do this the old fashioned way. This is the "Wencelas" font from Picnik perfectly sized and printed out.


I cut away most of the excess paper and placed it over some graphite paper (dark side down) and used a pencil to trace around my font.


The graphite paper transfers whatever you trace. Super, super easy and cheap to do (if you are poor and low-tech like me).


Then I used a tiny brush and some black acrylic paint to fill in my lines. The wood was really rough even after the whitewashing so I did have to deal with some squiggles.


To make the dot after the "No" I grabbed a larger brush, turned it around and used the handle end - a dip in the paint and one dot on the wood and you've got a perfect "."


Squiggly, rough, rustic. Just the way I like it. :)


And 1.5 seconds after I filled it with papers and slid it under the bed:


I think she's saying she doesn't want her photograph taken because this is her new super secret hideaway. SO glad I could make this special place for my cat.

Sidenote: Spud has taken to following me around as well. Case in point below.

What, you were trying to take a photo of this tree? Well why don't I sit in it and give you something really good to photograph.

Sunday, March 28, 2010

Scored: girly thrifty goodies

It's been a while since I've done any shopping or thrifting but when I did I found some great deals. I've got them listed here in order of cost from really doggone thrifty to still pretty thrifty.

A local bed and breakfast went out of business and had a garage sale to sell off all the furnishings, dishware, housewares - you name it, it was for sale. By the time I got there, there wasn't much left but I did find this cake plate in the free pile.

The glue has yellowed but as long as you keep it covered up with treats who will ever know?

For now I have it covered with a paper doily and I'm contemplating using it as a plant stand until I need it for something edible.

I love some of the deals Michael's has in their dollar bins. I found these adorable Mary Engelbreit cupcake liners and since they were only a dollar...how could I pass it up?

Look at this adorable pattern! I'm thinking these will be perfect for the Mad Tea Party. I'll have to visit The Ungourmet for the perfect cupcake recipe.


Next I found this little bit o' shine in the clearance aisle at Jo-ann. It's obviously from the bridal department, but it's a tiara, you think I could really leave it there?


And for this price?

Yep. That reads $1.97.
For now I'm making royalty out of my mossy bowl. When I'm not wearing it to do the dishes that is.


And those are my fantastic finds! All that girly, pretty fun for only $2.97! That alone makes me worthy to wear the tiara and be the bargain queen. :)
Linking to:

Thursday, March 25, 2010

Tweaking the vignette - horses and time

I have a project that needs tweaking and I've mentioned it before. I have been decluttering my dresser and setting up a few vignettes of things that make me smile. It's one of the first things I see when I get up so it's nice to get up to something clean and pretty.

I've set about not only decluttering and putting things together but making what I have work for me. Like this little egg timer.


It was a gift from my grandpa and I've had it for years. It was looking pretty shabby with scratches taken out of the stain, dust I couldn't get at to clean, even a few chips in the wood and I wanted to both protect it by sealing it and make it look more like something that fit in my space.

Enter the white paint. Which took four (or was it five?) coats. But it looks a bit stark so...
I used this which I found in my junk. I don't even know if they make this anymore and I could have made my own wash by mixing water and paint but this one is a little more gel-like and stayed better on those little spindles. It is just a brush-on-wipe-off process.


It still looks worn now, but like I meant for it to be.


It now looks right at home with my magnet board photo holder I bought at a local shop - featuring a favorite photo (my great aunt). The little key dangling from it matches my junk art project (see? I had a sneaky plan!). I don't currently have any books that need propping up so I use my horse-head bookend to keep these books from running away. ;)


The photo is held on by buttons magnets - I love it.


Decluttered and me-ified. Now I can get up with a smile.

Linking to:

Monday, March 22, 2010

Meaningful junk - Tool box seed holder

Argh. I had the flu all weekend...or a stomach virus or something but this was my "ease back into the living" project. Nothing too complicated, but useful and meaningful.

I was digging around in some piles of my mom's junk and I found this beat up old tool box that belonged to my grandpa. It is really beat up, a bit rusty, for some reason there isn't paint on the lower front part (oookay?). And you know what? I'm not going to paint it or recover it in any way. Really.


I love the rusty bumpy scratches. :)

Plus my grandpa wrote his nickname on top and I don't want to cover that up for anything.

He also wrote the words "boat tools." Well I don't have a boat or even tools to fix one and since he was quite the gardener himself I decided to turn it into some seed storage.
I washed up the outside with a damp rag then opened it to find...

Spiderwebs. And spider carcass thingies. Like when a spider sheds its skin to get bigger. Ew ew ew ew!! Sorry but I don't do spiders and for some reason I'm always experiencing traumatic spider incidents (large spider+shower+my leg= scene from a horror movie. True story!). Thankfully there were no live spiders in here.

I found these reproduction wooden berry boxes and popped three inside my tool seed box.


With three separate boxes I can organize them by vegetable, flower and herb.


After I took that photo I remembered all the other veggie seeds I had in the other room. I go a little seed crazy this time of year, especially when my local store has a 50% off sale. :)


Since I wasn't doing anything major, yet wanted to make the box's new purpose clear, I used a blog header created by The Graphics Fairy and added the text using Picnik. For some reason my printer was being possessed and wouldn't print any red ink so it came out quite yellow, but it works. I stuck it on with glue dots so it is removable should I change my mind about what I want to use it for.


And you know what? My grandma's nickname was Seeds so this ended up having a lovely unexpected double meaning for me.


I guess I'll grow me a garden of memories. And yummy things to smell and eat. :)

Linking to:

Reinvented


Friday, March 19, 2010

This took FAUX-ever!

Or: From 80's to Old World
Or: The Project That Wouldn't End

Yesterday I posted about my attempt at changing a garage sale find into something more my style. What I ended up with was something still 80's in a different color sense but just as retina scorching. Since then I've been faux finishing my fingers to the bone trying to make it fit in my space. And not burn my eyes. Want to make sure you know that was my main goal.
If you want to read the first part go here.

To tone things down I first dry brushed some bronze metallic paint on my black portions.


Then I made a wash (watered down paint) of a light tan to take the bite out of that white but keep the luminous pearl visible.

I applied the wash liberally then dabbed with a paper napkin.


Next I took a less watered down wash of a much darker brown and applied it to the outside edges of my white triangles, let slightly dry, then wiped off with a paper napkin. The best thing about this stuff? It if gets too dark or in the wrong place a little water and dabbing or wiping takes care of it.

Now it looks old and has a little dimension to it. By now my eyes are crossed. This thing has taken me three days to finish!


But doesn't that look better?


Whew! I need a nap. Or at least something new to look at. I think I'll go sit in a lawn chair outside and enjoy this 60 degrees and sunshine!

Linking to:
Poppies At Play (creative cats)

Wednesday, March 17, 2010

Mexican-French inspired...all the rage

Okay, so it's not all the rage, but you never know and I could start something! ;)

I started with two things I've had for ages, but suddenly looked at them and they just weren't working for me anymore.

The fleur-de-lis hook I got a local shop years ago and the papier-mache Mexican star I got from my neighbor's garage sale. You really can't see the hook much because it blends into the books so well. So I did what every self-respecting redo blogger does and I painted it Heirloom White.

Now it's better but it's lacking dimension. Enter Burnt Umber, my secret weapon.

Dab some on...

Then smear it around with a damp paper towel - working it into the crevices to give the piece a more aged look.

The star I also painted white...by hand. Really. Actually that was the easy part!

Why white? Because I'm hoping to make it look more like this:


(image borrowed from here)

Once I had it painted white (which only took four coats) I painted the edges black.


Now its looking more like it, but it looks a bit dull.


So I paint inside each triangle with white pearl paint. I'm telling you the Sistine Chapel didn't take this long! Each time I thought I was done I'd turn the star and there'd be at least two more...ugh....
But I have to say it has a fabulous luminous quality that I just couldn't capture with a photo.

Now how do they look on the shelf? Wow you can actually see them!

Actually that star seems a bit...erm...bright (even for a star). I think I'll have to water down some tan paint and maybe some more Burnt Umber and tone this baby down. But that can wait until I can close my eyes and not feel like I've fallen into a Medieval torture chamber. All I see are spikes when I close my eyes.

For those late to the party I fixed it! Go here.

Linking to: