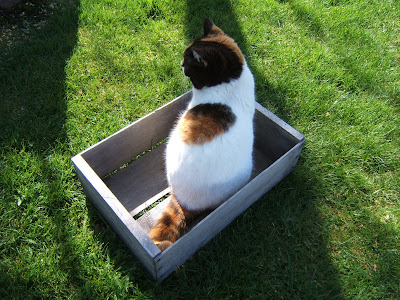
 And it was sitting on the ground for 1.5 seconds before my shadow had to check it out.
 She's "helping." Thanks Calliope. *eye roll*
 In my quest to turn my desk into a craft station I've been on the lookout for under-the-bed storage - places to put the papers and whatsits that I never look at that are currently being stored in my desk. When I saw the crate I got stars in my eyes and I knew it would be perfect for this!
 First I whitewashed it. I wanted to keep the weathered look but the wood also needed a little something to protect it a bit.
I didn't take any photos of the whitewashing because it was freezing outside and I just wanted to get it done and get back in the house! Just imagine a picturesque scene like Tom Sawyer or something.
I also got the idea to put the oh-so-popular numbers on the side. I am not a high-tech crafter and I don't have a fancy Cricut to just whip out some vinyl so I had to do this the old fashioned way. This is the "Wencelas" font from Picnik perfectly sized and printed out.
 I cut away most of the excess paper and placed it over some graphite paper (dark side down) and used a pencil to trace around my font.
 The graphite paper transfers whatever you trace. Super, super easy and cheap to do (if you are poor and low-tech like me).

Then I used a tiny brush and some black acrylic paint to fill in my lines. The wood was really rough even after the whitewashing so I did have to deal with some squiggles.
 To make the dot after the "No" I grabbed a larger brush, turned it around and used the handle end - a dip in the paint and one dot on the wood and you've got a perfect "."
 I think she's saying she doesn't want her photograph taken because this is her new super secret hideaway. SO glad I could make this special place for my cat.
 What, you were trying to take a photo of this tree? Well why don't I sit in it and give you something really good to photograph.
 I cut away most of the excess paper and placed it over some graphite paper (dark side down) and used a pencil to trace around my font.
 The graphite paper transfers whatever you trace. Super, super easy and cheap to do (if you are poor and low-tech like me).
Then I used a tiny brush and some black acrylic paint to fill in my lines. The wood was really rough even after the whitewashing so I did have to deal with some squiggles.
 To make the dot after the "No" I grabbed a larger brush, turned it around and used the handle end - a dip in the paint and one dot on the wood and you've got a perfect "."
And 1.5 seconds after I filled it with papers and slid it under the bed:
 I think she's saying she doesn't want her photograph taken because this is her new super secret hideaway. SO glad I could make this special place for my cat.
Sidenote: Spud has taken to following me around as well. Case in point below.
 What, you were trying to take a photo of this tree? Well why don't I sit in it and give you something really good to photograph.
 Gotta love them. :)
Linking to:


