Friday, June 26, 2009

Mustard?! Now let's don't be silly.


A little birdie told me there was a party, a mad tea party, hosted by A Fanciful Twist...


It's a good thing I have the appropriate attire! My great uncle Heinz's hat...and he was a magician no less.


Hat? Check. Key to secret rooms? Check. Pocket watch dripping with tea and jam (because...that's how you fix it you know). Check. Unbirthday cake? Double check.


Someone shrank my unbirthday cakes! That's what I get for wearing a magician's hat instead of something more ladylike.


I also call this one my Frankencake. ;)


And because this is a craft blog: I made the unbirthday cakes out of garbage! Well it doesn't sound appetizing when you say it that way. Scrap cardboard, paper scraps, felt scraps and other fabric scraps literally dug out of the garbage (remember how I told you the people I was house-sitting for had an amazing quilting room? They had a really fun garbage can full of scraps too!) All embellished with glitter and rick rack and sequins.


Ready for the giveaway?

To win my "tea with cream" earrings (see full description here) just leave me a comment! To get another entry and my everlasting gratitude add yourself to my lovely followers. :)

Already a follower? You still get that second entry. Be sure to let me know in the comments if you're following/just added yourself to followers. Good luck!

Tuesday, June 23, 2009

Putting garage sale goodies to use

Check out the other projects in this week's Trash to Treasure Tuesday over at Reinvented!

My first garage sale of the year! I know, I'm so behind! I did find a few goodies that I knew I could put to use. The crinkle paper (20 cents for both bags) will be perfect to ship my etsy goodies in; the hole punch (one dollar) will help me make tags and the shelf? ...


Izzy wanted to know why I was taking pictures of this dumb stuff instead of something cute like her, so I had to oblige.


The shelf was spray painted black (to match the other deck accessories) and is now the perfect spot to hang my drying herbs and flowers.


I believe it was a cup and saucer shelf - you can see the grooves running along the top where a saucer or plate could sit. And of course the cup hooks. :)


Gone are the horrible 80's tones and in are patina pots and fragrant plants. I'd say that's an improvement! And all it cost was a dollar and some spray paint.

See yesterday's post for another trash to treasure project!


And be sure to stop by this Saturday, the 27th for the Mad Tea Party! There will be confections and curlicues and...a giveaway!

Monday, June 22, 2009

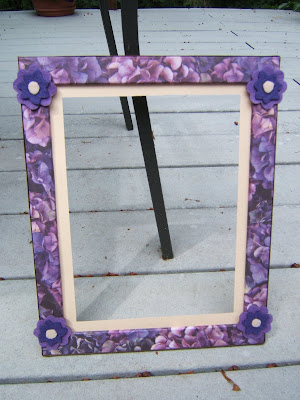
The fifty cent IKEA frames transformation

Not that fifty cent - they cost me fifty cents each because they were in the as-is section! I was originally going to make the frames for this project from scrap cardboard but when I saw these I knew they'd be perfect! They had "good bones" as they say.


Seriously scratched up plastic insert went bye-bye and then I covered the blah blue color with scrapbook paper, edged them in grosgrain ribbon and made little layered felt flowers to cover my seams. I also created a mat with cardstock, by simply cutting out the center.

Don't they look oh-so-much better?

Yes they are quite girly, but they are going in a baby girl's room so that's to be expected. Each frame will hold a photo of the grandparents so baby can always have her family nearby.

Friday, June 19, 2009

A clover, a bee, and revery


To make a prairie it takes a clover and one bee,

One clover, and a bee,

And revery.

The revery alone will do,

If bees are few.


~Emily Dickinson


I was daydreaming, staring at the lawn, watching the honeybees flit about on my glorious crop of clover (please hear the sarcasm in that). I'm pretty sure the lawn is more clover and moss than it is grass.

I was tearing out enormous clumps of it when I realized I couldn't win.

Fine. I told the clover.

I'm going to make something desirable out of you. I threatened.

And away I stalked to the computer (but of course!).


I discovered something wonderful! Clover is grand! And most importantly? Useful!

I found some uses for it here, and now that I have a huge supply of free material to fertilize my garden...well let's just say I'll be all smug when my garden grows to huge, healthy proportions. Plus my honeybees love it, and I love having them around, so I guess I can put up with it.

As I sat, studying and pondering the clover I realized it actually has a fantastic shape to the blossom - pretty really. Which of course got the hamster wheels turning in my mind.


What do you think? Not bad for something I once despised, hmmm?


Gather and dry a quantity of clover blossoms. The less open they are the better because they are more likely to retain their shape while drying.


I used scissors to cut large sections of blossoms and then raked them up with my hands into a shallow cardboard box and let them set for about a week. Don't want to do this alone? Let the kids help! They can pinch the blossoms off the stem with their little fingers. Just be sure to watch out for those honeybees.


I used a medium-sized styrofoam ball and attached a ribbon thus:


With a little hot glue for good measure.

Now that you have something to hang it with (and the ribbon step could be omitted completely if you just want your lovelies sitting in a bowl.)


I started near the center of the ribbon and hot glued the blossoms.


That's pretty much it! Just keep going until you've covered the entire ball. It's a little tedious, but no more so than any other similar project. I found that if I placed a one half to one inch line of glue and quickly stuck the blossoms in it went rather quickly.


A Summer tea party anyone? Wedding maybe?


If you didn't like stark white ribbon against the "antiqued" look of the dried blossoms, try soaking it in a cup of tea until the ribbon looks right to you.

Nature-inspired with a slight vintage look this project certainly doesn't look like most of the supplies came free from the yard.


Wednesday, June 17, 2009

Beyond the Garden Gate

One Saturday I happened to be in the Battleground, Washington area and got to visit a place I've been hearing about for months - Beyond the Garden Gate. If you live in the Portland Metro area you should absolutely take a drive to visit this little gem.


This is not one of those huge, only looks homey but is totally cookie cutter kind of shops - it's on her place in a little room that looks like a garden shed. Icicle lights dangle from the open rafters and cast a magical glow and a big fake cow stands watch outside.


She sells vintage, handmade (plenty of local items as well as her own creations), and gourmet foods and goodies in every nook and cranny.


This large barnwood star and little bench cost around $19 for both. Yeah! (The little bench was four dollars!) I also got a punched metal heart that is now hanging on my bedpost and a raspberry truffle, but that one is long gone my friends. :)

Beyond the Garden Gate can be found at

17414 NE 199th St.

Battle Ground, WA 98604

I have no clue what her hours are but you can give her (Cathy) a call at 360-687-0075 and find out.

Monday, June 15, 2009

House-sitting: watch reruns on TV or....

...take along enough craft supplies to last you a year (let alone two weeks) and make a HUGE list of things to accomplish?

How about both?

I made two more kusudama (kusudamas? kusudami?) and let me tell you that folding 120 squares of paper is one of those things that makes a great "do this while you watch tv" deals. I've never watched NCIS before, but I remember seeing something about it on Missie Zee's blog so I've now seen more episodes than I care to admit (there have been two marathons this week). But hey! The kusudamaseses are finished.


I also managed to start another set of wool dryer balls as well as work on those IKEA frames from way back when (pictures will come when they are finished). ALSO got another cell phone cozy done - my brother's girlfriend's mom wanted one and her purse is pink soooo:

My second ever blanket stitch project. I'm...umm...learning. :)

If you missed my first post on this project you can find the tutorial here.

I also have some Fourth of July/Independence Day hostess gifts/centerpiece projects in the works so be sure to come back and check those out.


The good: the woman of the house is an avid crafter herself and has a whole basement full of crafty goodness. You should see her quilting room. Seriously.
And they have all kinds of movies I've been wanting to see and haven't got around to yet.

The bad: dial up. Guhhhhhhhh! It's okay I'll live. :) Only one more week.


~~~~~~~~~~~~~~~~~~~~~~~~~


Brittany at Food for Thought has awarded me with a Premio Meme Award! And I'm supposed to tell you seven things about my personality:

1 - Unflappable - I can keep a fairly calm demeanor throughout most any situation. And I've been in some very. interesting. situations.

2 - Feisty - could be short woman syndrome (instead of little man syndrome), but I am no shrinking violet.

3 - Corny - I love dumb jokes and puns and silly word play and stuff like that. Like, "I wondered why the baseball was getting bigger. Then it hit me."

4 - Creative - I hope! Haha. There are a few creative things I haven't gotten into, like quilting and scrapbooking, but in general I love to try things. I'm currently trying to learn to solder well. Hmmm.

5 - Quietly rebellious - I follow rules but I like loopholes. Like how I'm looking to buy a 1971-72 Chevy truck (like this one) because then it will be old enough I won't have to take it through DEQ every couple years. Sticking it to the Man! Bwahaha!

6 - I'm a Lit Nerd - I'm the one who will laugh hysterically at the Duke and the King butchering Shakespeare's plays in that scene in The Adventures of Huckleberry Finn. I'm the one who was watching Psych and when there was a scene with a boat named "Rocinante" said, "That's Don Quixote's horse!"

7 - A listener - I think I must look like someone who you should pour out to because I seem to get that a lot. Which is okay! And I don't think I even need to give advice for everything, sometimes just hearing and sharing is helpful too.

Friday, June 12, 2009

If it's one less thing I have to buy at the store

...then I am all for it! THAT is the real reason I like reusable things. I figured my friends probably appreciate that too which is why, if you are my friend Megan and you haven't got your package yet then you'd better stop reading or you're going to spoil the surprise. :)


No more Megan? Okay, continuing...


Megan can pinch pennies like no one I've ever seen so when her birthday came up I knew she'd appreciate something that was useful to her home and family and be something she wouldn't have to continue spending money on. Plus I've been just dying to try these!


Wool dryer balls!


I'd been hearing about these for a while now but I've never felted anything before so I was feeling a little timid. Well it is NOT hard so if you want to try these then break out the soapy hot water, friends!

I followed this tutorial but I do have some recommendations from what I learned in the process.

First of all, I think white, or just undyed, wool is the way to go. I did a practice run with a scrap of green wool yarn and it did turn my hot water green as it was felting. Seeing that I just wouldn't feel all that comfortable putting all kinds of whatever colored dryer balls in with my laundry...unless it was a color match!

I did not put mine in with a load of laundry to felt them. I put them in a large bowl of soapy, hot tap water (as hot as I could get my tap to go) and swirled and "agitated" them around for a while with my hands. You may have to let them soak alone so the water can cool somewhat and not burn your hands. When the water cooled completely I dumped them out, rinsed them and then threw them in with the laundry into the dryer.

I also felted mine twice each run and I think that made mine look more like a solid ball than the ones shown in the tutorial. Once they'd been through the hot, soapy water then dryer routine, I immediately did it again and that second time made a big difference in their solidity and look.

I also made my core out of unbleached 100% cotton yarn. I think it really helps that first step maintain its shape.

And in case you're interested in exactly what kind of yarn I used, it was Fisherman's Wool and it costs $8.99 for one skein. I made these four dryer balls and have probably enough to do that many more from what is left, plus I used a coupon for the yarn so total cost is not bad!

I haven't tried them myself yet, but I hope they work as well as they claim.

In other news...

My hometown Relay for Life is this weekend! So if you were wanting to donate to the American Cancer Society you can visit my etsy and get some swag in return!

Speaking of etsy have you checked out the Yart Sale going on over there? I bought myself some goodies here and there are plenty of other shops participating - and yes, that includes me. :)

If you're looking for bargains on handmade goods, then this is the week to get them.

Wednesday, June 10, 2009

You HAVE to try this - kusudama

Once upon a time I discovered a lovely place called Folding Trees where absolutely everything is made of paper and it inspired me to try many projects and to look at paper in a whole new way...


Wayyyy back in January I made my first kusudama for my friend Karen. She and my friend Megan have some similar tastes and I knew Megan would like it too so I dusted off the memory, and re-visited the tutorial and made another.


I used some shimmery scrapbook paper I found that had a medium weight to it. Scrapbook paper is the perfect size for this project because you need just four sheets to make a kusudama using 3x3 inch squares. (and you'll have a few pieces left over)

The paper I used was medium weight and, while sturdy is good, it isn't flexible to make the whole thing come together easily where a thinner paper would work just great for that.


Still...I think they are just lovely! Read a little more about the kusudama here.

Tuesday, June 9, 2009

Yart Sale starts tomorrow, June 10th!


What is a Yart Sale?
It's an Artistic Slant to a traditional Yard Sale: Yard + Art = YART
Tons of etsy shops are participating so drop by and shop your little hearts out - it promises to be a lot of fun! And there are loads of bargains and who doesn't love a bargain? Plus you'll be supporting handmade!
Visit my shop and search "yart" to find the deals. Then be sure to browse around and check out the other participants too. Have fun! :)

Monday, June 8, 2009

Easy cell phone cozy from eco felt

Uh-oh...your cell phone is ringing. Can you actually find it in the bottom of your purse in time to answer it? Has everyone in the store become familiarized with your ringtone yet? Oh if only you could just grab it and answer the thing!

Yeah. That's my mom. Which is why for her birthday I made her a cell phone cozy from incredibly affordable eco felt and grosgrain ribbon.


I could have bought her one, but she uses a pretty big purse and I wanted one that would hang safely inside, long enough she could zip her purse and not have problems. Plus I just like making my gifts. :)


I've never made a cell phone cozy before, didn't have a pattern and didn't have a clue how to blanket-stitch but that was the plan! Here's how I did it:


I started by stealing her phone and measuring its size on my selected color.


Then I cut out two equally sized pieces using all my handy rulers, grids and a rotary cutter. I made sure to leave a little extra room on all sides to allow for my stitching.


One side of the pocket would have to be short enough to see the top of the phone when it was inside otherwise you wouldn't be able to grab it easily, so that side is trimmed. In the photo I'm indicating where I decided to trim mine. The other side would have to be much longer so I could create a loop that would hold the ribbon, so that side is not trimmed.


I knew I wanted an embellishment on the front of the cozy so to get that started I freehand drew on regular lined paper one of my favorite things - a flower!


Using a Sharpie I traced around my pattern onto the felt and cut them out. I figured the flower would look better with a little depth so I cut one of the flowers smaller and cut a small round for a center.


I glued them together and onto the front of the cozy using a glue designed for felt projects. This will keep your design in place until you are ready for stitching.


The felt glue takes quite a while to dry, but it works pretty well. Of course, not well enough that I would trust everything to stick together while being banged around and squished inside a purse so I put a single stitch through the flower middle and the middle of each leaf.


Next I used pins to secure my two sides of the cozy together and followed this tutorial on blanket stitching to hold the sides of my pocket together.


For this part I didn't divide my embroidery thread so I'd have nice, thick stitches and I also chose a color that would disappear to hide any mistakes, haha! But I think it's customary for this kind of stitching to choose a color that complements and yet stands out.


Also, be sure to cut a large enough piece of thread to take you through to the end!


It was actually pretty easy!

Then I needed to make my pocket for the ribbon. I folded the felt over enough to accomodate the ribbon and blanket stitched along the edge.


Um...don't look too closely at the stitches on this part, it gave me some troubles.


Then I used a small crochet hook to push my ribbon through.


I cut a small piece of velcro and stitched it to the ribbon ends, careful to secure it and not tear up the ribbon. Using some Stop Fray or something similar would probably be helpful at this step to prevent the ribbon from coming apart on you.


And make sure you get each side of the velcro on the correct side of the ribbon!


And there you have it!


My mom loved it and also loves not having to dig around her purse for her cell phone when it rings!