Wednesday, December 30, 2009

So I know I've accomplished something this year

With the way time slips by it is so nice to look back on the year and say, "Yes I did accomplish something!"

So what did I accomplish this year?
I got my green on by turning these Starbucks beverage bottles into vases.


Upcycled an oatmeal container into a yarn holder.


And used newspaper to make a flower pocket.

Tried my hand at the homespun kind of life with wool dryer balls,


And rose petal jelly.


I Lived Lovely by "using the good stuff" (and several other challenges).


Twice (at least!)

Made art out of poetry and a paper bag.


Made a spring pom-pom garland with tissue paper and ribbon.


Discovered what to get for the guy who has everything.


Decorated my candles with things I found in my house...


And made a bare bulb chandelier to shed a little light on the subject.


I shared my "botanical apothecary" collection.


Made something pretty out of something that was frustrating me.


Learned how to hand-sew and made this cell phone pocket from eco-felt.


Turned mismatched oddities into a jewelry catch all.


Inspired you to find the pin-up in you with silk flower hair clips.


And put that new hand sewing knowledge to good use and made myself a flowered headband.


Thanks for joining me on this look back over the highlights of the last year - here's to more loveliness and creativity in 2010!
Be sure to click the photo below to visit the party!

Monday, December 28, 2009

The rescued furniture is not for the cat, I swear

This little dressing table was rescued from a dumpster - totally thrown away and unloved! Poor little furniture.


Stamped on the back - this looks like a well traveled dressing table. Finland and Los Angeles?
It was sitting in the dining room waiting to be painted when I walked by and saw this:

Hmmm. ;)
The arms that swing out were removed for painting and haven't been put back on yet, but with a coat of white paint and a few Christmas decorations it looks great in the entry under a Goodwill bought mirror. And there is a second drawer to be put in - it was briefly misplaced but have no fear - it has been found!

Notice anything weird in the photo? I walked by and caught her again. I swear she is not allowed on any other tables in the house but she is really in love with this one. What a goof. :)

Thursday, December 24, 2009

Merry Christmas

Compared to last year,


This isn't the sort of "white" Christmas I was expecting. :)


Little Spud (who is quickly becoming not little) was the only critter brave enough to go out and take photos with me in the morning cold.


Even the mustangs were hiding.


Merry Christmas to you all!

Monday, December 21, 2009

What do you make for a guy?

An original poem by Molly who is obviously delirious from overcrafting and holiday preparation.


Besides candy and cookies and slices of pie,

What in the world do you make for a guy?

Last year he got art and duct tape flowers,

A new nifty idea's taking all of my powers.

He likes metal and chrome and things that go vroom,

But for that kind of stuff he hasn't got any room.

Oil and grease, tools or a lathe,

Pick that out myself? I'm not that brave!

The items on his list will cost me a mint,

All I'll have left in my wallet is old pocket lint.

So what do you do when you're in this position?

How about a nice magazine subscription!

How do you tell someone you bought them a magazine subscription? "Hey...you're getting some magazines sometime in the near future." Hmmmm. Doesn't really have that "gifty" feel. I just saw in a magazine (can't remember which one!) where they wrote a note and wrapped it up in a box. Good idea! Thank you magazine that I will credit once I have copious amounts of caffeine and remember.

The Manly Version

On a scrap of gray cardstock I traced around an actual wrench shortening it somewhat to fit inside the box I chose.

Here's the box I chose. Do I have taste or what? It was the packaging for something I just had shipped to me but it was a good size for the project so I stripped off all the packing tape.
You can see just behind it is some "diamond plate" scrapbook paper I actually bought at a garage sale this summer - I knew it would come in handy!


Before I did any paper application I painted all my edges black. This way, if there ends up being an edge showing, it just kinda blends into shadow.

I traced around each side I intended to cover on the back of the paper, cut out and glued on with regular old white school glue.


Looks awesome!

I added some "detail" to the wrench [please don't laugh at my artistic ability ;) ] and the message "Enjoy a year's subscription to Popular Mechanics" - if you haven't heard yet, amazon is having some amazing magazine subscription deals.

I shredded some festively colored newspaper ads and used them as filler in the box and set in the message wrench.


Now here's a creative way to let someone know their gift won't be arriving for 3-4 more weeks!
I was inspired by this project - check it out!
Linking to DIY Day @ A Soft Place to Land


My shabby little hall tree

Wrong kind of hall tree. I literally mean a little tree for my hallway. :)

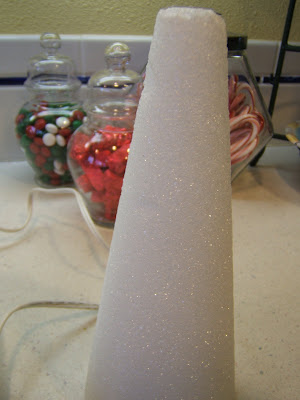
Kara made a couple (she wrote the tutorial so give her site a visit) and I had this old, beat up cone in my craft supplies so I decided to go for it.

I decided I wanted a star so I freehand drew one on the back of a pudding box headed for recycling. You can see I'm such an artist that I got it perfect on the first try. ;) Also notice I made a little "stem" for it to stick into the top of the cone.

Cut out and make sure it fits.

Pick out what fabric you want, trace and cover. I only did one side of the star (call me lazy?) but if you have a freehand star and want to cover both sides be sure to flip your template around to make sure you have fabric that will fit to each side.


I had originally thought about making just a jute tree and then decided to go with the shabby fabric tree but decided to give it a jute base to look something like a tree trunk.


Now for the main course! I ripped my fabric strips to give them some nice texture (as per Kara's tutorial). If you've never ripped fabric strips before it is easy AND fun. Cut a small start,


then holding the large part of the fabric stationary, grip the "strip" side and pretend you're the Incredible Hulk - I was using muslin so it tore very easily.


Then I did a little factory set up and made plenty of loops to glue around.

Make sure your strips are going in a straight line around the circle. Maybe drawing a guide mark would help but I found myself going quite crooked a few times.


All finished and looking shabby cute in my entry sitting atop my garage sale candle holder.


I also tried another thing I've been seeing around - the book page wreath. Now I am a bibliophile through and through so to tear up a book and use it this way you have to know I chose something no one would ever miss.

I ruffled crepe paper for the center (albeit crookedly!) and added a cardstock circle that I stamped.

Time consuming? Yes. But the cost of the project was so negligible that these would make great gifts!